alright, I did all that. Now I just export as scene?
You need to select the mesh you want to export (click control-j to turn multiple meshes into one and control-a to apply all transformation) then go to File->export->Ogre3D->Export_Ogre. Just make sure you know where exactly you are exporting and that you selected Meshes and Armature at the bottom left of the window (pic 10 in the tutorial I sent you).
Ok, here are the exports for the Mitochondria, Chloroplast, Golgi Apparatus, and ER. The Mitochondria export contains the animation, the rest of the meshes are each rigged to a single bone named “anchor.” The ER is not rigged, because as far as i know it doesn’t move. I am unfamiliar with Ogre and even more so with the plugin I used to export these files, so let me know if there’s anything wrong with them.
Hey, @Chizu_Nordenstam, just checking up on your current progress with the models! It’s really no rush since none of these models other than the nucleus will be in the next release.
http://www.mediafire.com/download/ygdcyljficxiien/Nucleus.blend
^The nucleus blend file, I haven’t set up an ogre exporter on my current computer yet. Should probably do that. Then I can upload a correct file for Ogre.

^The simple texture used for the dots.
I noticed that we don’t have a full model for the nucleus of the cells, and without anywhere else to post about it I guess that this place is the best way to start.
I have a very basic model that I tried to fit to the style of the other organelles hat are scattered around the forum,

It comes in at 1220 vertices and 1256 faces.
And then there’s the ridiculously high-vert.-count subdivided one:

18060 verts(!), 18272 faces(!!!)
I tried to get the… wrench-like things (yes, I know, i’ the best biologist around) and the inner ball, which I know should be a ball-of-string structure, but to save on vertices I decided to just make it a sphere.
[Sorry for completely forgetting all of the names of what’s inside a nucleus]
[I would have placed this somewhere else, but I didn’t want to jump into anyone else’s thread]
I moved it to this topic, because it’s useful but doesn’t require an entirely new thread. You should be able to delete a post by clicking the ellipsis (…) in the bottom corner and clicking the bin icon.
1 Like
@BobzeMovie: that’s a nice model, but we actually already have one for the nucleus.
@Chizu_Nordenstam: that’s a nice model, but I don’t think the image uploaded correctly. If you don’t have the exporter set up, you should as @Nanu to do it for you.
@TheCreator
I know, when I posted this there wasn’t one (then it got moved to this thread underneath the other model), but I’m just going to leave it here… just because really.
Ok, I downloaded @Chizu_Nordenstam’s nucleus and exported it. Here’s the link. This mesh wasn’t made the way I usually make it, so i don’t know if I exported it correctly. Let me know if theres something wrong,the link contains folder with everything blender exported.
I’ll try posting it in the Slack instead then.
And thank you @Nanu for exporting it.
No problem, great work on that material by the way, its far better than anything i could have made
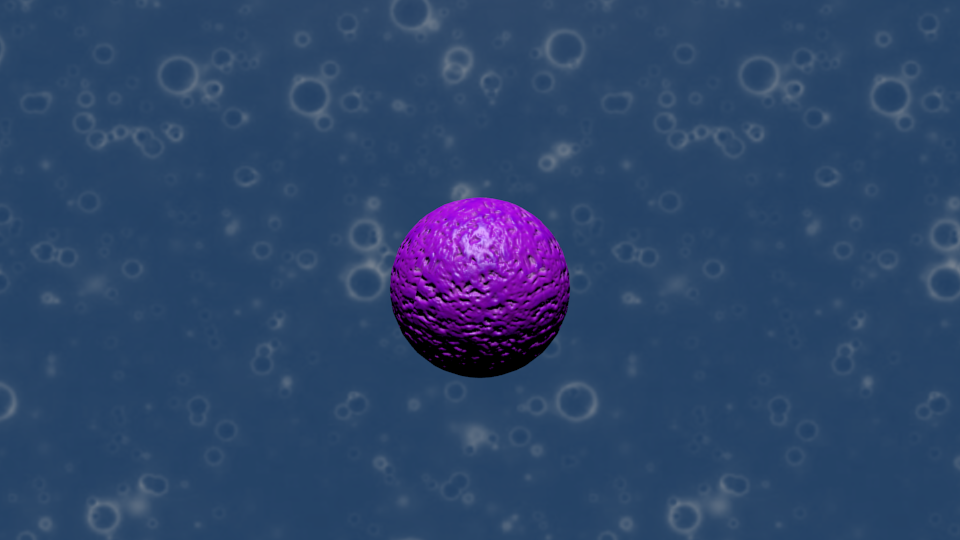
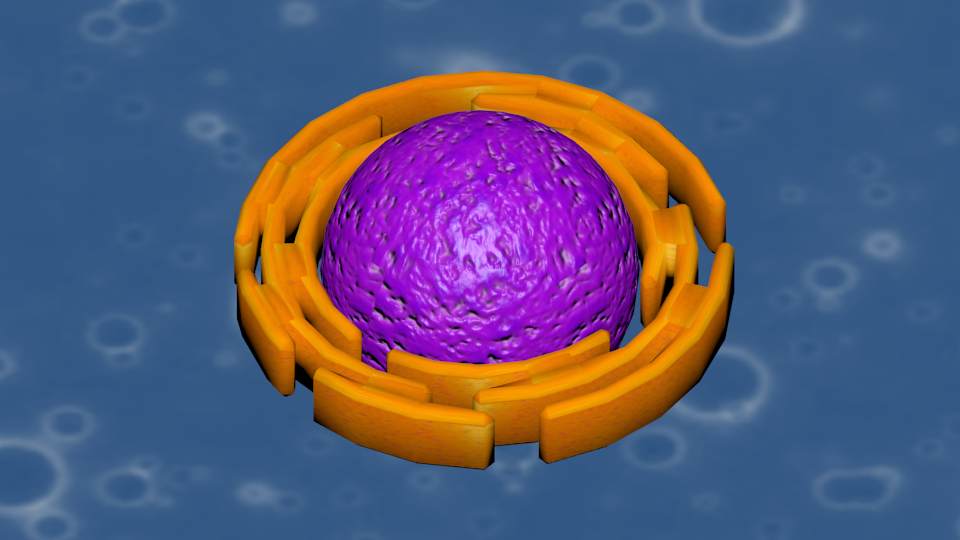
Alright guys, my computer is still getting fixed, but I do have blender on my laptop. I’m very limited in what I can do because its a low end laptop, but I managed to make a new nucleus since our current one is missing it’s material. This one is pretty simple, just a negative orange skin texture, it will definitely need to be replaced eventually. I added a bone as well, since I’m assuming we’re using bones to animate and anchor the organelles. Here’s the link.
And a picture:

Also, since I can work with blender (but not cycles render), I’m going to try making new materials and meshes for our current organelles, I like the color of them, but I think maybe some transparency would help, and /i definitely need to clean up the vertices.
1 Like
The monotony of the nucleus model has actually been one of my biggest gripes graphically, so this will be such a nice improvement!
Nice job. Could you add a displacement map to make it looks more coarse and so that the specular lighting isn’t as bright? Otherwise it’s a huge improvement from what we had before.
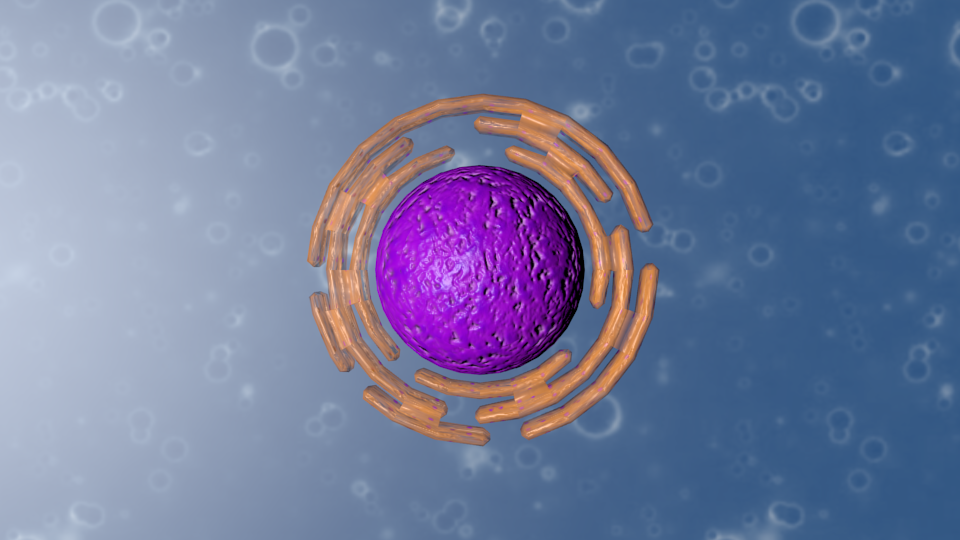
Another thing, when you’re done redoing the old organelles, could you create an “upgraded” version of the endoplasmic reticulum that extends all the way around around the nucleus?
Of course, but I think I read somewhere else on the forum (I apologize for not knowing exactly where) that we might be using an upgrade system? Should I make extra meshes like mitochondria with more folds or chloroplasts with more thylakoids?
Alright, Here’s the new nucleus with displacement and specularity mapping. I used the same png for both displacement and specularity. If we need to use jpg to save space or just for memory allocation problems just let me know.
And here’s how it looks in blender render:
1 Like
I made the new mesh for the ER, Here’s the Ogre Export
And per usual, here’s a preview in Blender Render
I don’t know how I feel about this one, I like the mesh, but no matter how much I tweak the material, it just doesn’t look right, I’ve tried complete opacity, different levels of transparency, and different normal maps, but nothing looks right. I also didn’t take the time to UV map it correctly, but I figured it wouldn’t make a difference since it will be so small in game. This one also has a displacement and specularity map, but I don’t think they’ll really make much of a difference, and could just be removed if need be.
The nucleus model looks much better now, though the holes aren’t really uniform.
Have you tried using the old material for the endoplasmic reticulum? That one was amazing, and I think this one could do with more saturated and brighter colors. Also, could you scale it to be much closer to the nucleus (almost touching it).
Great work so far. This is going to look much better than the ones currently in-game.
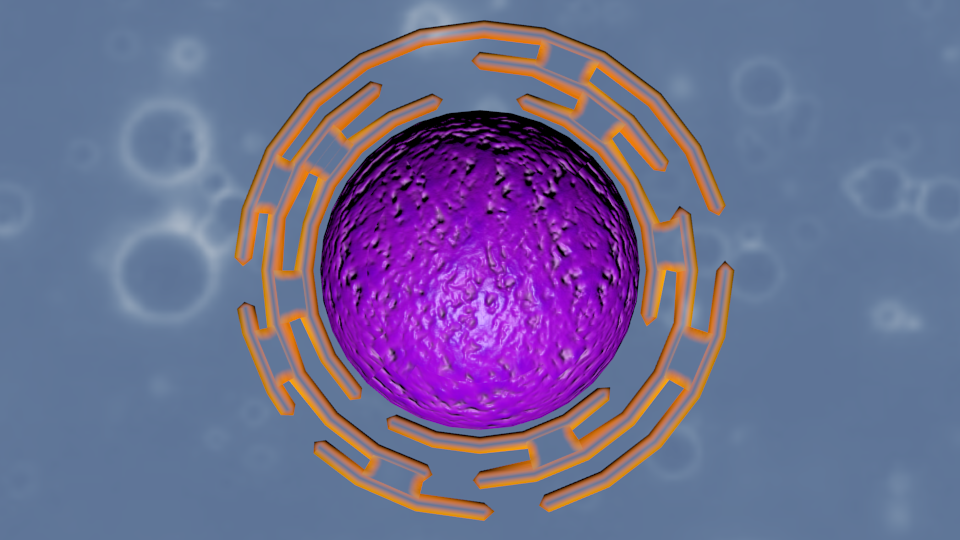
Alright, took me a few hours, but I UV mapped the entire mesh (almost)correctly, and have made a new material using the same method I used for the Original ER.
Here’s the Transparent Version:

And Here’s the Opaque Version:
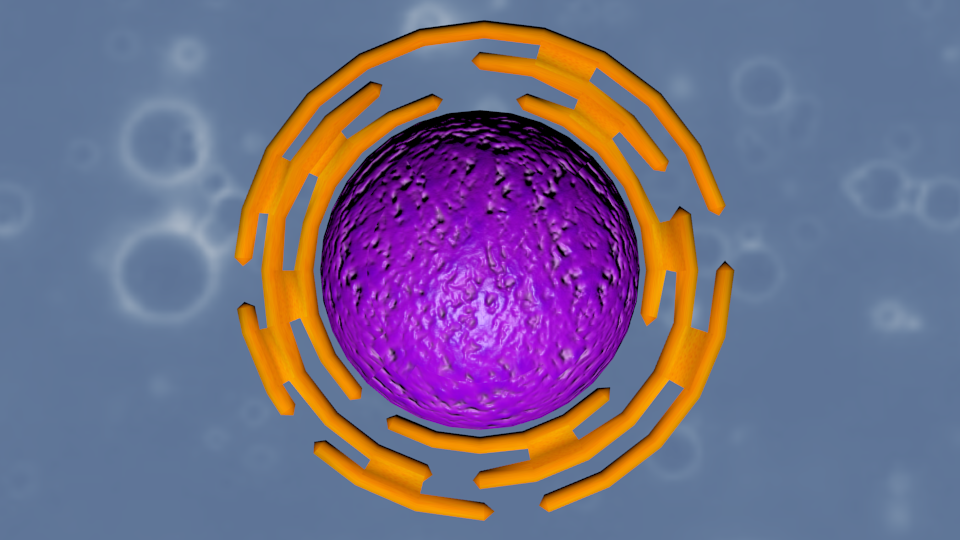
The opaque version uses jpg to save space and because it’s more performance friendly. These meshes are also not interchangeable, the transparent is mapped specifically for the transparent material, as is the opaque to the jpg texture.
On another note, I have added extra performance friendly meshes, which have no bottoms or sides, since only the top part of the ER is visible anyways. It has half the vertices and shouldn’t look any different in game, since you only see the organelles from one angle. Each version has this extra mesh, again specifically mapped for their materials, they are caled “ERCut.mesh.”
I made 2 different versions simply because I couldn’t decide which would better, so I made both. Obviously the Opaque stands out more and is more performance friendly, but the transparent seems more realistic and can be fun to play with if we decide to have different color organelles.
It’s all up to preference, which is why I like providing multiple options.
(One final note, I am aware that there are mapping errors on the transparent version, but they are so minuscule that they aren’t likely to be noticed in game, as there is a limit to how close you can zoom in)
2 Likes